Food is an important part of a balanced diet. ~Fran Lebowitz

Friday, February 10, 2012

Italian "Meatball" Soup

This is a great cold weather dish.  It's also a one-pot, super easy and healthy meal. 

Italian "Meatball" Soup
(adapted from here)

Ingredients:

2 medium carrots, peeled and finely chopped
2 stalks celery, finely chopped
1 small onion, finely chopped
1 Tb olive oil
2 Tb tomato paste (no salt added)
4 garlic cloves, minced (or cheat like me and just scoop some out of the jar)
1 Tb oregano
1 28 oz can crushed tomatoes in puree
2 cups veggie broth
1 1/2 cups water
16 fully cooked veggie meatballs (Morningstar makes awesome ones)
Sea reshly ground pepper to taste
Good Italian bread, cut into in to cubes
1Tb olive oil
Fresh chopped parsley

Directions:

Heat oil in large saucepan over medium heat and add vegetables.  Cook for about 5 minutes until soft. Add tomato paste, garlic and oregano and stir well.

Add tomatoes, broth and water and bring to a simmer.  Cut meatballs in half and add to soup.  Simmer for 10 minutes more and season with salt and pepper.

Meanwhile, preheat oven to 425.  Toss bread cubes with olive oil and arrange on a baking sheet.  Bake for 12-14 minutes or until golden.

Ladle soup into bowls and garnish with toasted bread cubes and chopped parsley and maybe a little (or a lot) of freshly grated parmesan.

I'm so bad about taking pics after I cook the food!  This is from the original website.

Chocolate Chip Buttermilk Scones


These are so yummy...just like everything from Gina over at Skinny Taste.  I seriously love her blog and cooking style.

"Skinny" Chocolate Chip Buttermilk Scones (via Skinny Taste)

Ingredients:

3/4 cup cold low fat buttermilk
1/4 cup sugar (I used 1/2 stevia, 1/2 regular)
2 tsp vanilla extract
1 large egg (I used egg sub)
1 cup all purpose flour
1 cup white whole wheat flour
1 Tb baking powder
1/2 tsp salt
3 Tb cold butter, cut into small pieces
3/4 cup mini chocolate chips
1 large egg white, lightly beaten
2 Tb sugar

Directions:

Preheat oven to 375° and spray baking sheet with Pam.  Combine the first four ingredients in a medium bowl, stirring with a whisk.  Set aside.

Combine flours, baking powder and salt in a large bowl, stirring with a whisk.  Cut in chilled butter with a pastry cutter (I do not have a fancy pastry cutter, so I used 2 knives and it worked fine), until the mixture resembles coarse meal.  Gently fold in chocolate chips. Add milk mixture to dry mix, stirring just until moist.

Place dough onto a floured surface and knead lightly with floured hands.  Form dough into an 9-inch circle onto baking sheet, about 3/4" thick. Using a knife, cut dough into 10-12 wedges all the way through.

Brush egg white over dough and sprinkle with 2 Tb of sugar.  Bake for 18-20 minutes, until nice and golden.  Serve warm and try not to eat them all in one sitting.  They are soooo good with a cup of coffee.

We ate them all before I could get a picture:)  This is the pic from Skinny Taste.

Tips:
* When the ingredient says "cold" (the butter and buttermilk), make sure it is nice and cold.  This helps hold the dough together.
* The buttermilk makes a difference, so I did not make these dairy free (anyone know if there is even a "soy" buttermilk out there??).  I did, however, use Earth Balance for the butter and my chocolate chips were dairy free.  The minimal amount of buttermilk did not seem to upset my stomach too much.
* I am kind of a chocolate chip snob.  I like the Ghirardelli Mini Semi-Sweet Chips
* I debated about going straight whole wheat flour, but I think the mix of white and wheat gives them a nice texture, while still adding some fiber.  All wheat flour may cause them to be too dense.

Thursday, September 29, 2011

Cake Batter Blondies

Ok, now this recipe is a must make.  Like, you will want to eat the entire pan in one sitting.  Try and refrain yourself though.  Or don't.  I actually had several blog friends post this recipe, so I figured it had to be pretty good...and it is.  They are pretty rich, but I did sub some of the ingredients to make them a little more waist friendly.

Cake Batter Blondies
adapted from here

Ingredients
1 box cake mix*
1/4 cup oil (I used applesauce)
1 egg (I used an egg sub)
1/2 cup milk (I used almond)
1/4 cup rainbow sprinkles
1/2 cup white chocolate chips
Extra rainbow sprinkles for top
Frosting*** (store bought or homemade)

Directions
Combine the cake mix, egg and oil in a large bowl and mix well.  Slowly add the milk until you have a pretty thick batter.**  Mix in the sprinkles and white chocolate chips.  Scoop the batter in to a 9x9 inch baking pan that has been sprayed with Pam.  Bake for about 25 minutes at 350 degrees.  You want them to be a little gooey in the middle.  Remove pan from oven and let it sit on a wire rack for 30 minutes or so (or eat them warm if you aren't going to frost).  Once cooled, frost.  Sprinkle the extra sprinkles on top.

* The original recipe actually calls for Funfetti cake mix, which I have also used, and it's good, but I just prefer to use the Cherrybrook Kitchen brand because it's gluten and dairy free.  Their yellow cake mix is my favorite for pretty much any cake recipe!
** This should be a pretty dense batter.  You want to be able to stir it, but it shouldn't be to the point where it would just pour out of the bowl. 
*** You can use however much frosting you like, and in whatever flavor you prefer.  Since the bars themselves are pretty rich, I personally like just a very thin layer of frosting.  I cheated and just used a container of whipped strawberry frosting.

Image from here

Tuesday, September 27, 2011

My Favorite Veggie Chili

This is hands down my favorite chili recipe.  Although I feel like it's a little different every time I make it, it's always good!  I may vary the veggies depending on what I have on hand and what's in season at the market, but this is the basic recipe I follow.  You may be skeptical of chili without meat, but I promise you won't miss it with all this other goodness.  Sometimes if Matt is wanting some "meat" in his chili, I'll add a cup or so of Boca crumbles.  The best part about this meal, it's done in the crock pot...a great fix-it-and-forget meal!

Veggie Chili

1 large onion, diced
1 bell pepper, diced
1 poblano pepper, diced
1-1/2 cups frozen corn
1/2 cup frozen edamame
2 heaping Tbs. minced garlic
20 oz. can red kidney beans, rinsed and drained
15 oz. can black beans, rinsed and drained
28 oz. can diced tomatoes (do not drain)
15 oz. can fire roasted diced tomatoes (do not drain)
1 packet chili seasoning mix
1/2 Tbs. paprika
1/2 tsp. cayenne pepper
1/4 cup brown sugar
Salt/pepper to taste

Just mix everything in a large crock pot and cook on low for 6-7 hours.  That's it!  I like to eat mine with warm cornbread.  Matt likes his with shredded cheddar cheese and tortilla chips.  It's good both ways:)

Saturday, August 27, 2011

Pineapple Upside Down Cake

I don't know why, but I had a serious craving for this the other day.  I was specifically craving that gooey, syrupy, brown sugar goodness that is on the top.  Well, and those maraschino cherries.  I had a box of gluten free pound cake mix, so I decided that I would take the "short-cut" route with a recipe I found in my Joy of Cooking cookbook.  This was so easy, but the presentation makes it look like you spent a lot of time on it.

Pineapple Upside Down Cake

2 Tbs. light butter
1/2 cup packed brown sugar
1 can pineapple rings, in their own juice, drained with juice reserved
1 small jar maraschino cherries without stems
1 box pound cake mix
1/4 tsp. allspice
1/2 tsp. ginger
2 eggs (an egg sub works fine)
3/4 pineapple reserved juice

Preheat oven to 350 degrees.  Spray a 9-inch cake pan with cooking spray, coating completely.  Dump the butter in the pan and place in oven for a few minutes until melted.  Remove pan from oven and swirl the butter around so it completely coats bottom of pan.  Evenly sprinkle brown sugar over butter.  I had to use a fork to break up the sugar and make sure it was blended into melted butter.  Place one pineapple ring in center and then add the other rings around it (you won't use all the rings).  Place a cherry in the center of each ring, and if you like cherries as much as me, add the extras in any other open space.  Set pan aside.  In a medium mixing bowl add cake mix, spices, eggs and reserved pineapple juice.  Using an electric mixer, beat on low to incorporate ingredients.  Turn speed up to medium and beat for 2 minutes.  Carefully pour batter over the pineapple rings.  Bake at 350 degrees for 35-40 minutes.  Make sure you check it at 35 minutes though!  Once nice and golden, take it out and tilt pan side to side to loosen the edges (don't skip this step, it helps for when you have to invert it).  Let cake cool for a few minutes.  Now comes the trickier part.  Place an inverted serving platter or cake stand over top of cake.  Holding platter with one hand and cake pan with other (using a hot pad of course), invert the cake on to the platter.  Carefully slide the cake pan off.  If you greased the pan well and loosened the edges you shouldn't have any problems.  You can serve cake warm, but after it's cooled, I like to stick it in the fridge.


Wednesday, July 20, 2011

My Favorite Banana Bread

I've tried many different recipes for banana bread...full fat, low fat, vegan, sugar free, you name it.  If I see a new recipe, I try it.  This is my favorite one.  It is so moist and full of flavor, but low in fat and sugar.  I love the addition of the chocolate chips, but of course you could leave those out.  Seriously though, why would you do that?!

My Fave Banana Bread

Preheat oven to 350 degrees.
In large bowl beat the following together:
3 ripe bananas, mashed*
1/2 cup sour cream or Greek yogurt (vegan versions work well)
1/2 cup unsweetened applesauce**
1/2 cup brown sugar
1/2 cup white sugar (I use Stevia)
2 eggs (I use an egg sub)
1 tsp vanilla

In a separate bowl, stir together the following:
1 cup all purpose flour
1/2 cup whole wheat flour
Pinch of salt
1 tsp baking soda + another 1/4 tsp

Add the dry ingredients to the wet ingredients and mix until combined.  Do not over mix!  Gently stir in 1/2 cup mini chocolate chips (I like the non-dairy ones).  Pour batter into a greased loaf pan.  Place in preheated oven and bake for about an hour.  Do the toothpick test to check for doneness.  Let cool on wire rack, but cut you a little piece because it's amazing right out of the oven:)

* As soon as a banana gets a little too ripe, I pop it in the freezer.  I always have frozen bananas in there.  They are great for smoothies and banana recipes like this...just let them thaw on the counter for 15 minutes or so.
** The applesauce is really a sub for oil.  The difference in using the 2 is that the oil makes the bread more fluffy and drier and the applesauce makes it more dense and moist.  Obviously I use the applesauce because it pretty much eliminates all fat in the recipe, but if you prefer oil, use 1/2 cup.

Wednesday, June 15, 2011

Lemon Blossoms

I'm not entirely sure if these are considered muffins or cupcakes, or maybe a muffcake?  We usually eat them as a dessert, but they would certainly make a yummy breakfast.  They are insanely good either way.  Don't skimp out on the glaze...it's what makes them sooooo good.

Lemon Blossoms

1 box yellow or lemon cake mix
1 small box fat free/sugar free instant lemon pudding mix
1 cup egg substitute (equals 4 eggs)
3/4 cup oil (obviously I use 3/4 cup baby food pears....you won't know the difference!!)
Glaze (see below)

Mix everything up in large bowl.  Beat with electric mixer for a few minutes until smooth.  Pour into muffin tins that have been filled with paper liners or sprayed with Pam.   Bake at 350 degrees for about 15-17 minutes.  While baking, make the glaze: whisk together 4 cups powdered sugar, 1/2 cup fresh lemon juice, 1 Tb. vegetable oil and enough water (4-5 Tbs) to make a nice glaze.  When the muffins come out, dip them into the glaze (cover the entire crown) and set on a baking sheet to dry.  Let them sit for at least hour so the glaze hardens up nicely.

* When making the glaze, add the water 1 Tb at a time until you get the desired consistency.  If it's too thin, it won't coat the muffin crowns very well.
** Definitely start checking the muffins t 15 minutes.  I prefer these a little on the undercooked side.
*** Although you probably won't use all the glaze, save it!  It's awesome on pancakes, waffles, vanilla ice cream, or just straight from the container.  I also like a little drizzled on apples:)

Monday, June 13, 2011

Polenta and Veggie Foil Packs

I have never had polenta.  I didn't even know where to find it in the grocery store (by the pasta...at least at Whole Foods that's where it was).  Turns out it is considered a grain/starch as it is basically cornmeal.  It's kind of a weird texture and I was mildly amused by how it ooozed out of the tube.  It was good though, and I will most definitely be using it again.  Anyways, this is a nice little healthy recipe that is super tasty and relatively easy.  The clean up is great since you can just throw out the foil.  When Matt was grilling out his Sunday night steak, he threw a few of my packets on the grill.

Polenta and Veggie Packs

1 can white beans (navy or great Northern), rinsed and drained
2 tomatoes, diced
6 oz package of crumbled feta
1 tube of polenta, cut into 12 slices
1 zucchini, sliced in rounds
1 jar roasted red peppers
Salt and pepper

Mix together beans, tomatoes and 1/2 of the feta in a bowl; set aside.  Take 4 pieces of foil (each one should be about 18 inches long) and fold in half.  Spray them with Pam.  Working with one piece of foil at a time, spoon 1/4 of bean mixture in center.  Layer 3 slices of polenta in an overlapping circle.  Top with a few zucchini slices and 1/4 of the roasted red peppers.  Sprinkle on some S&P.  Crumble a little more feta on top.  Do the same thing with the remaining foil pieces.  Fold up each packet and pinch the ends so it's fully closed.  Place on the heated grill and close lid.  Grill for about 10-12 minutes.  Carefully remove packets and stick one on each plate.  Open them up and dig in!

Monday, May 23, 2011

Pineapple Cake

Wow, it's been awhile since I have posted a recipe, which means I haven't been doing a whole lot of cooking/baking lately.  Blame it on law school.  Law school is to blame for everything.  Anyways, when Grams passed away last year a neighbor brought over this cake.  Matt and I loved it so much I had to get the recipe from her.  I made it this past weekend for a cook-out with friends and it was a big hit.  It's a perfect summer cake, and great to take to potlucks/cook-outs.

Pineapple Cake

1 box yellow cake mix with whatever ingredients called for on the box (I usually use an egg sub that equals 3 eggs, 1 cup water and 1/2 cup baby food pears)
1 can crushed pineapple in its own juice
1 small box fat free, sugar free instant vanilla pudding mix
1 cup skim milk
1 container Cool Whip
1 cup shredded sweetened coconut

Bake cake according to box directions (subbing baby food pears for oil and egg substitute for eggs if you want to be a super hero), in a 13x9 inch pan.  Once cake is baked, set it aside to cool.  Meanwhile, whisk together pudding mix and milk until good and smooth.  Let sit in fridge for awhile to thicken up.  Fold Cool Whip into pudding.  Once cake is cool, poke holes all over it with the end of a wooden spoon.  Pour pineapple, with juice, all over.  Let that sit for 10 minutes or so.  Spread Cool Whip mixture over pineapple, covering completely.  Sprinkle with coconut.


Obviously the longer you let this cake sit, the more the pineapple and juice soak in, which creates a whole lot of deliciousness.  It's such a great summer dessert, and if you use the subs I mentioned, it's very light.

Friday, April 22, 2011

Perfect for Easter Cake

Although holiday cooking is one of my very favorite things, I am not overly crazy about cooking for Easter.  This is probably because we spend a good chunk of the morning at church dealing with the crazy parking and crowds and I don't want to have to rush home and spend the rest of the day in the kitchen.  We go out for brunch on Easter Sunday after church.  I love this little tradition almost as much as I love the fact that Easter hats are coming back in style.  They are, right? 

I did, however, make this lovely cake for us to enjoy during the Easter weekend....

Picky Palate
It tastes as good as it looks.  I improvised a little from the original recipe (no shocker there) to cut down the calories and I doubled all the ingredients to make the layers bigger.

Easter Cake

2 boxes white or yellow cake mix (I used yellow)
2 small boxes sugar-free/fat free instant vanilla pudding mix
16 oz. container of fat free sour cream
1 cup water
1 cup (2 jars) baby food pears (or of course you can use 1 cup of it goes straight to your thighs oil)
1 cup egg substitute
Food coloring (red, blue, green, yellow)
Can of whipped cream cheese icing (of course you can make your own, but I didn't have time for that)

Preheat oven to 350 degrees and grease four 8-in round cake pans.  In a stand mixer, stir together cake mixes and pudding mixes.  Dump in sour cream, water, egg and baby food.  Mix all together and beat for several minutes until thoroughly combined and smooth.  Pour batter evenly into 4 separate bowls.  Add your food coloring a little at a time to make the pastel colors of your choice.  Pour batter into the 4 prepared cake pans.


Bake at 350 for about 22-27 minutes.  Start checking with a wooden skewer around 20 minutes since all ovens vary.  Place pans on wire rack for 10 minutes.  Remove cakes carefully and let cool completely on racks.  Once cooled, stack layers, spreading a thin layer of icing between each one.  Once stacked, ice the entire cake.  I decorated with some Robin's Eggs.


Tips and tricks:
* The baby food works really well in this recipe.  We did not miss the oil at all.  However, baby food tends to make cakes a little more dense, which is why I used 2 boxes of cake mix (and doubled all ingredients) here.  I wanted to make sure my layers were thick enough.
** When you first put everything in the mixing bowl, stir it with a large spoon before turning the mixer on so the dry ingredients don't go flying everywhere.
*** Make sure you add the food coloring a little at a time because you're going for pastels here.  A few drops of red made the pink color, a few drops of yellow made the light yellow, same with the green, and a few drops of red and a few drops of blue together made the light purple.
**** Make sure your cake pans are well greased and floured so that cooked cakes easily fall out.  

Sunday, April 17, 2011

Easy Peasy Blueberry Pie

A good pie is something in my arsenal of recipes that I feel the need to perfect.  Like, I want to be known as the lady that makes a mean pie.  You know, the lady that when a potluck is coming is coming up and everyone hopes that she brings her "famous pie."  Yep, pretty sure it is one of my life ambitions to be that lady.

This pie is not perfect, but it's pretty good.  I would be more inclined to brag about it if I made the crust from scratch, but I did not.  Therefore I am not entitled to brag.  I am probably not entitled to be that pie lady until I have perfected a homemade crust.  Guess I'll just stick with being the lady that makes the somewhat decent pie but did you know she uses a *gasp* pre-made pie crust.  Plus if this recipe included a homemade pie crust, then it wouldn't be easy-peasy, and most of you would probably run far far away.

Blueberry Pie

1 package refrigerated pie crusts (top and bottom)*
6 cups fresh (or frozen, thawed and drained) blueberries
1 cup sugar (I used 1/2 stevia, 1/2 pure cane sugar)
1/4 packed brown sugar
Drizzle of agave syrup (this isn't necessary, but I just love agave)
1 tsp ground cinnamon
1/3 cup quick cooking tapioca (don't actually cook it)
1 Tb. fresh lemon juice
2 Tb. butter, cut up
Extra sugar for dusting

Remove pie crusts from box and let sit on counter for about 20 min or until they have reached room temperature.  Carefully unroll one crust and lay it over a 9-in. pie plate, pressing sides and bottom to line plate.  Trim any excess crust.  In a large bowl stir together white and brown sugars, cinnamon, cinnamon and agave (if using) until combined.  Toss in lemon juice and blueberries and mix well.  Set aside for 20 minutes.  Go ahead and preheat the oven to 425 degrees.  Once the blueberries have "soaked" spoon them in to the pie crust.  Dot with butter.  Carefully unroll the other pie crust and place on top of blueberries.  Fold edges under plate and flute however you wish.  Cut several slits in top crust and sprinkle with a couple Tbsps. of sugar.  Bake for 45-50 min. until nice and bubbly. 

* I am very partial to the Immaculate Baking Co. pie crusts, or that whole brand in general.  Good stuff.


** I like to use a little of the excess dough (from when you trimmed the bottom crust) and cut a heart (with a cookie cutter) to place in the middle, just to make it pretty (and to hopefully overt one's eyes from my terrible fluting job). 
*** Always check the pie around 40 min. into baking to make sure the crust isn't getting too brown.  If it is (which will more than likely be the case), cover the top with foil and continue baking.
**** You can use whatever fruit you like.  Just use 6 cups (chopped if the pieces are large).  Note that 6 cups of fruit will make a pretty deep dish pie.


Maybe one these times I'll be able to get a picture before Matt and I dig in:)

Sunday, April 10, 2011

Curry Chickpea Cakes

I'm kind of obsessed with all things curry these days so this will probably be one of many curry inspired recipes you will see on here.  These are good though because even if you don't like curry, you can make them with some other spices and and head in a totally different flavor route.  Still, I recommend the curry route:)

Curry Chickpea Cakes

1 (15 oz) can chickpeas, drained and rinsed
1/3 cup minced (tiny, tiny pieces) green onions (green and white parts)
1/3 cup light coconut milk
2 tsp. sugar
1/2 cup breadcrumbs (you may need more so keep it handy)
1 tsp. curry powder (or more depending on how much you like curry!)
1/2 tsp. nutmeg
1/2 tsp. cumin
1 cup cooked brown rice
1/2 tsp. sea salt
1/4 cup olive or grapeseed oil

Combine chickpeas and onion in food processor or blender and pulse until combined and smooth*.  Transfer to large bowl and add the coconut milk, sugar, breadcrumbs, curry, nutmeg and cumin.  Stir all together until well combined.  Stir in brown rice and salt and mix well.  You are going to form the mixture in to patties, so if it seems like you need more breadcrumbs to make them stick together, add it.  Mold mixture in to small patties (probably about 8).  Heat oil in a large saute pan over medium heat.  Add the patties 4 at a time and saute until a nice golden brown (about 5-7 minutes each side).  Do the same thing with the second batch.  Transfer to a paper towel lined plate to drain.  Serve warm.

* If you don't have a food processor or blender, you can just mash the chickpeas and onions up with a potato masher.  It will just take some muscles.
** These are yummy on their own, but they are also awesome served over a salad with a vinaigrette.  I also eat them chopped up in a pita with cooked tabouli, some lettuce and diced tomato and a drizzle of vinaigrette.

Wednesday, April 6, 2011

Vegetarian Sloppy Joes

My favorite recipes are ones that remind me of childhood...things my mom used to make a lot.  Sloppy joes are nostalgic for me.  This was one childhood staple that I had to figure out a veggie substitution for.  I like to sing that Adam Sandler song "Lunch Lady Land" while I am making them..."sloppy joes, slop, sloppy joes..."  (Don't pretend you're not singing this to yourself right now).

I've tried several variations, but I think this is my favorite.  It is slightly adapted from my Skinny Bitch Ultimate Everyday Cookbook, once again.  This should make 5-6 servings.

Veggie Sloppy Joes

1-1/2 cups water
1/2 cup dried lentils
2 Tb. olive oil
1 small onion, minced
1 red bell pepper, diced
2 carrots, grated
1/2 cup seitan*, finely chopped
1 (6 oz) can tomato paste
1/4 cup ketchup
1 Tb. balsamic vinegar
2 Tb. tamarin or soy sauce
1 Tb. Dijon mustard
Salt and pepper
Whole wheat buns

In a medium saucepan, bring the water to a boil.  Add the lentils, cover, and reduce heat to low.  Let simmer for 30 minutes.  In a small bowl, whisk together tomato paste, ketchup, vinegar, soy sauce and mustard; set aside.  In a large skillet add the oil and heat over medium heat.  Add onion, bell pepper and carrots and saute until soft, about 10 minutes.  Add the seitan and saute for a couple more minutes.  Drain the lentils (save the cooking liquid in case you need it) and add to the skillet.  Mix in the tomato sauce and stir everything until all combined and heated thoroughly.  Season with S&P.  If it seems a little on the dry side, you can use some of the reserved lentil juice.  Keep warm over LOW heat until ready to serve.  Spoon over toasted buns.  Put your bib on and get sloppy.  These are good served with baked french fries and fresh corn.

Tips:
* Seitan is a protein made from wheat gluten.  It is tasty and makes a good meat substitute.  It's usually in the refrigerated section by the tofu.  I usually get the Westsoy brand.  I love it in saucy dishes like this one.  You could certainly just use soy crumbles (Boca or Morningstar) if seitan weirds you out.  Just heat the crumbles according to package directions and use just like you would use ground beef.
** You can add or sub other chopped veggies.  I have used corn, mushrooms, broccoli, whatever I may have on hand.  The above combo is probably my favorite though.

Sunday, April 3, 2011

Key Lime Pound Cake

DISCLAIMER: I tweaked this Southern Living recipe to make it vegan friendly.  I thought it was good.  Matt said it "tasted vegan."  Not entirely sure what that means, but I guess if you are used to your pound cake with loads of butter, eggs and cream, you may also think this "tastes vegan."  I encourage you to venture out and try it a'la vegan, but I will give you the regular SL version and put my subs in parenthesis.

Key Lime Pound Cake
1 cup (2 sticks) of butter, softened (I used Earth Balance)
1/2 cup shortening (I used Earth Balance)
3 cups (yikes!) sugar (I used 1/2 cup agave syrup and 1 cup stevia)
6 eggs (I used an egg replacer in an amt. equivalent to 6 eggs)
3 cups flour (I always use white whole wheat flour and think it is the best)
1/2 tsp. baking powder
pinch of salt
1 cup milk (hemp milk was used here)
1 tsp. lime zest
1/3 cup Key lime juice
1 tsp. vanilla

Key lime glaze
1 cup powdered sugar
2 Tb. Key lime juice
1/2 tsp. vanilla

Preheat oven to 325 degrees.  Lightly grease and flour a 10 in. tube pan.  In a heavy stand mixer, cream together butter and shortening until fluffy.  Gradually add in sugar and continue to beat until all blended and smooth.  Add eggs, one at a time, beating just until blended after each addition.  In a separate bowl, stir together flour, baking powder and salt.  Alternating with milk, add flour mixture to butter mixture, beginning and ending with the flour (don't know why recipes always say to start and end this way, but I'm not one to take chances, so I just do it).  Stir in lime zest, lime juice and vanilla.  Pour batter into tube pan and bake at 325 for 1 hour to 1 hour and 15 min (start checking for doneness at an hour with a long wooden toothpick).  Cool on a wire rack for 15 min.  Remove from pan to wire rack and cool completely.  Prepare Key lime glaze.  Drizzle glaze over cooled cake.  It's good with a little vanilla icecream on the side:)

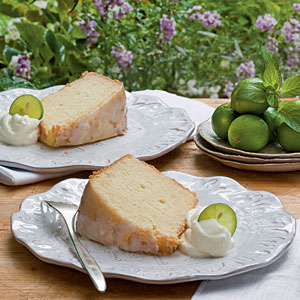
We ate this up pretty fast while my parents were here so I didn't get a picture, but here's the one from Southern Living...

Saturday, April 2, 2011

Mushroom Asparagus Risotto

I used to be kind of scared of risotto.  I always thought of it as this difficult dish that required a lot of time and skill.  In actuality, risotto is pretty simple and forgiving.  Assuming you don't forget a major ingredient or step, you should be fine even with a few mishaps.  The good thing about risotto is that as long as you get the consistency right, everything gels together nicely.  Plus it's generally a one-pot dish.  Two big pluses in my book.

We really like this dish (adapted from my Skinny Bitch Ultimate Everyday Cookbook)...the flavors are awesome.  Of course you can experiment if you don't like mushrooms (what's wrong with you though?!) and/or asparagus.  Again, consistency of the risotto is the key.

Mushroom Asparagus Risotto

5-6 cups vegetable broth
3 Tb. oil (I used safflower)
1/4 cup butter (I used Earth Balance)
1 cup chopped fresh mushrooms (portabellos work good)
1-1/2 cups asparagus, chopped into 1 in. pieces
Salt and pepper
1 tsp. chopped garlic
1 small onion, chopped
1/3 cup shallots (or the white parts of green onions), chopped
1 cup Arborio rice, uncooked
1/3 cup white wine (you could just use vegetable broth, but the wine really makes the flavors pop)
1/2 cup Parmesan cheese*

In large saucepan add the veggie broth, cover and keep warm over LOW heat.  In a large saute pan over medium heat add 1 Tb. oil and 1 Tb. butter.  Add mushrooms and asparagus and saute until lightly browned, about 10 minutes.  Season with salt/pepper, remove from heat and transfer to a bowl.  Next, using that same large saute pan, heat remaining oil and butter and add garlic, onions and shallots and saute for a few minutes until soft.  Add the rice and stir until combined.  Add the wine and stir until wine is absorbed.  Now start adding the warm broth, 1/2 cup at a time**, waiting until each addition is absorbed before adding the next.  Stir pretty consistently and continue adding broth until rice is creamy...takes about 30 minutes.  Stir in mushrooms and asparagus and Parmesan cheese.  It should be a nice creamy pot of goodness.

Tips:
* I think the quality of Parmesan used in this recipe is key.  For my portion, I stirred in a good vegan parmesan "cheese."  For Matt's portion I used freshly shredded Parmesan from the cheese counter at Whole Foods.  The better the cheese, the more creamy your risotto.
** It's important to add the broth slowly, waiting until each addition is fully absorbed before adding the next.  The rice needs to absorb the liquid a little at a time.
*** Risotto is great because once you have mastered the technique, you can do so much with it.  If you want meat in your dish, you could add some chopped cooked chicken, but I promise you won't miss it if you don't:)

Wednesday, March 30, 2011

My new endeavor (or because I OBVIOUSLY have nothing else better to do than pretend I am Paula Dean)...

So I could literally post a recipe a day because I love playing in the kitchen on my downtime and experimenting with new recipes. I LOVE when people post new recipes on their blogs...I seriously bet I print at least one a day. Between my blog stalking, Southern Living and Veggie Times subscriptions, my numerous cookbooks and the Whole Foods website, I am constantly finding new stuff to try. I want to share what I like, but since I don't want my personal/family blog to be overtaken by all things food, I thought this would be a good outlet. I'll try and post new recipes (that have been tested and given the McWilliams' stamp of approval of course) a few times a week, depending on how much time I spend in the kitchen. Time spent in the kitchen is usually directly proportional to my stress level, so if a week goes by with nothing, please pray for my sanity...and maybe send some Valium. Thank you:)